Ok, in my last post I was able to access the switch management GUI, now I want it to be as up to date as possible. Hours of searching over several days led me to this:
- The Mellanox SX1024 was released in 2012.
- It was EoL’d in 2021 with the last delivered units in June of 2022.
- The last supported MLNX-OS version for the SX1024 was 3.6.8012.
- At roughly the same time, MLNX-OS was rebranded as Mellanox Onyx and they released the software under both the old MLNX-OS and the newer Onyx names.
- In 2022 Nvidia completed its purchase of Mellanox, and in the last two to three years purged all of it’s no longer supported product software and documentation from it’s web pages.
- And there was this from the MLNX-OS software release notes I ran across:

So I couldn’t just load the version I want and be on my way. My switch had 3.6.5009 and the most up to date version for this switch is 3.6.8012. Based on what info I could find, I could do this in two jumps, from 3.6.5009 first to 3.6.6106 and then to 3.6.8012. 1Easy peasy, right? Several more days of sleuthing and I was able to locate the two upgrade images I needed from HPE. I have versions 3.6.5009, 3.6.6106, and 3.6.8012; if you need them, email me and I’ll happily send them to you. If you want to find them yourself, you’re looking for these filenames in particular: 2
- image-PPC_M460EX-3.6.5009.img
- image-PPC_M460EX-3.6.6106.img
- image-PPC_M460EX-3.6.8012.img
If you need an older intermediate version you’re going to have to find that by yourself. FYI… there is a really good thread on updating the SX6036 on the STH forums that is worth finding and wading through. 3
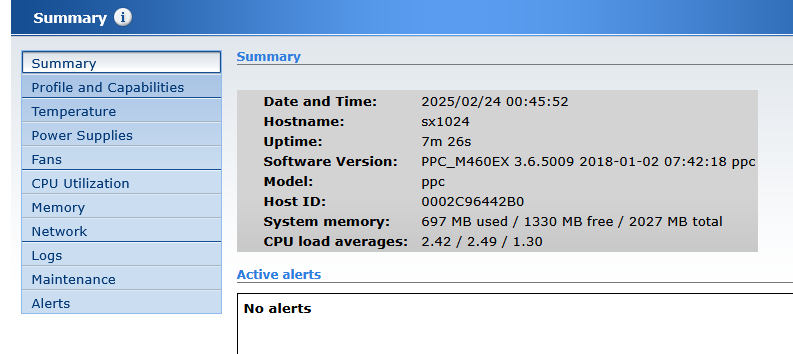
Now for the updates and this is where that bucket of patience I mentioned comes in. While this can be done through the console, I’m going to use the management GUI that I configured in the Configuration Wizard. So I connected a laptop to the Management Port on the SX1024, on the laptop in a browser going to the IP I set for the Management Port and entering the credentials I set in the Wizard got me this:
If you set the Management Port to use DHCP, you’re going to have to source that from your laptop to get it to work.
First, spend sometime and poke around the UI. You know that you want to. When you’ve gotten that out of the way, follow System > Onyx Upgrade to get to this:
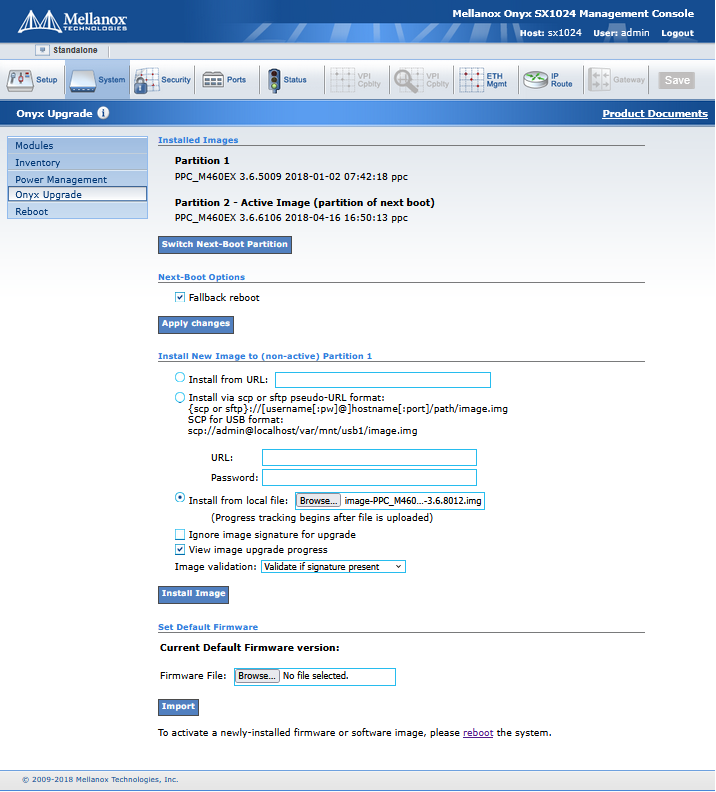
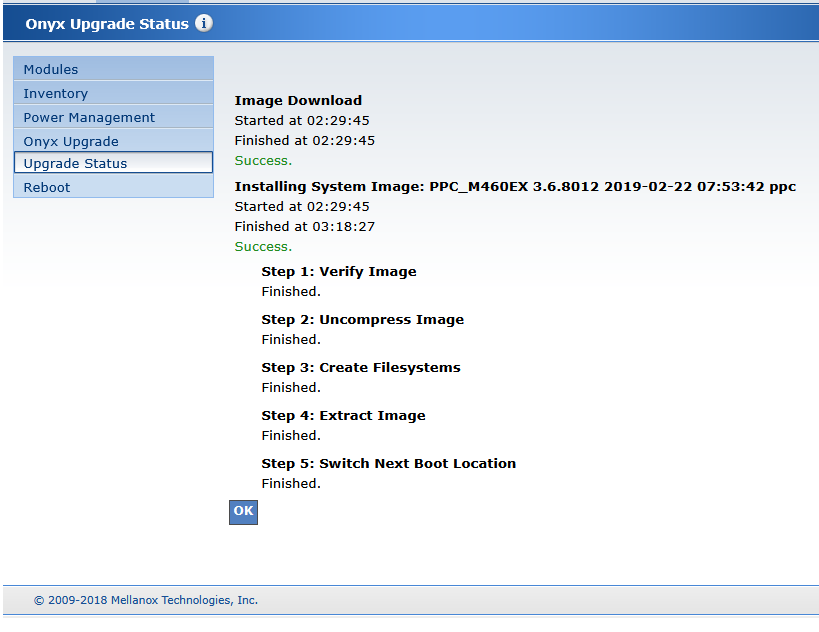
Scroll down to the “Install New Image to (non-active) Partition x” section and click on “Install from file location” and browse to the image file you need to update to the next version. Either don’t validate or validate if signature is present. Click “Install Image” and now you wait. For my switch it took about 75 minutes for the upgrade process to complete, and when it’s done you’ll be greeted with something like this:
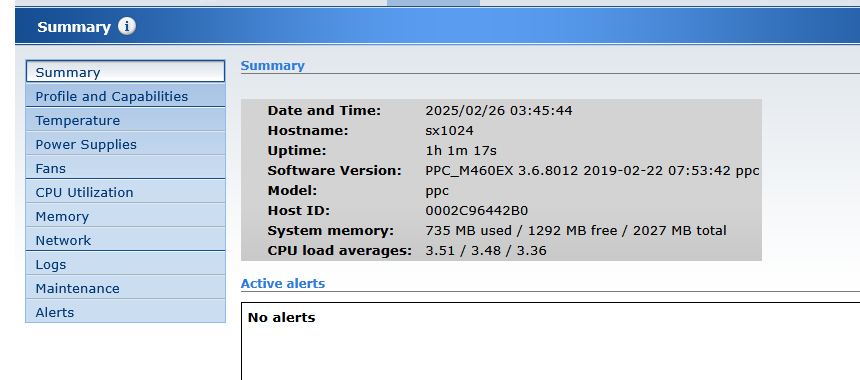
Reboot the switch and verify that it is indeed using the version you just installed. Repeat this process until you get to 3.6.8012 or whatever version you want. At boot up mine now looks like this: 4
Thanks for taking the time to read. As always, comments and questions are welcome.
Comments
Loading comments…